|
The RQ-1 Predator is a
medium-altitude, long endurance unmanned aerial vehicle system. The RQ-1A
designation is for the pre-production version while the RQ-1B designates the
baseline production vehicle. RQ-1B Predators, operated by both the CIA and USAF,
were widely used for surveillance and, for the first time, in direct action
against key targets in Afghanistan. In general, the Predators were used to
provide detailed targeting information, often expanding on electronic
intelligence from the Nimrod R.Mk 1, RC-135 Rivet Joint and the EP-3E Aries II.
In this role, they worked alongside U2s and, later, RQ-4 Global Hawks and E-8
J-STARS. Predators fed live imagery back to their ground stations, revealing
details of the targets, whose precise location was then uplinked to loitering
strike aircraft. Predators worked closely with, among others, AC-130 gunships
and F-15Es. In the direct attack role the Predator carried two AGM-114 Hellfire
missiles which could be guided by operators at ground stations in real time. In
one instance, they were used against a specific al-Qaeda target in a residential
area, where the use of precise aiming and a small warhead were imperative.
|
Click on images below to
see larger images |
 |
 |
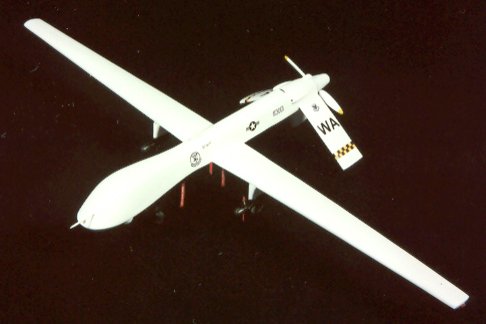
This model depicts a Predator in the
attack role. The Unicraft kit (1/72) is made up of 17 pieces cast in a light tan
resin. The landing gear has been cast with a metal wire trapped inside each leg
which will definitely help support the resin body. I started off by filling in
the small pinholes which seem to inhabit most resin kits. I also filled in the
panel lines which is my preference in this scale. As all of the parts were made
to mount flush, brass pins were used to connect the wings, stabilizers and
weapon pylons to the main body for increased support. Be very careful as to how
you treat the model as it is being assembled! After I joined the wings to the
main body, both wings looked straight and level. However, the left wing started
to warp on me when I tried to speed up the drying of the paint by placing the
Predator in a warm (110 degree) food dehumidifier. This warpage can be seen in
several of the photos. There is definitely a moral in this story
somewhere!
|
Click on images below to
see larger images |
 |
 |
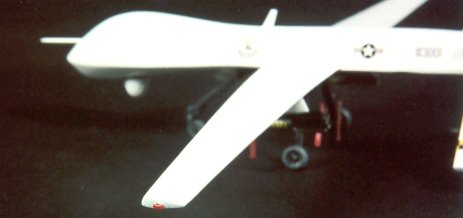
For ease in handling the model
while building it, I drilled a deep hole through the tail into the body and
inserted a brass rod for use of a handle. When the model is complete, the prop
spinner will cover the hole.
|
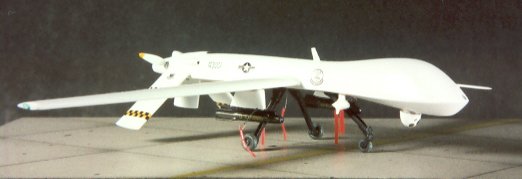
| The main landing
gear are joined together with a plug that slips into the fuselage. I
found it easy to add the main gear
before painting which allowed me to fill in the resulting seam. The main
gear was easy to mask off while painting. I painted the gear legs
Testors Interior black, added detail from a silver artist pencil and
painted the wheels Testors Euro 1 Gray. This is my favorite color for
scale aircraft tires.
|
|
| All photos that I found of
the Predator with Hellfires showed them without the top avionics hump and
with a blade antenna in the same position. A blade antenna was made from
brass PE from the spare parts box.
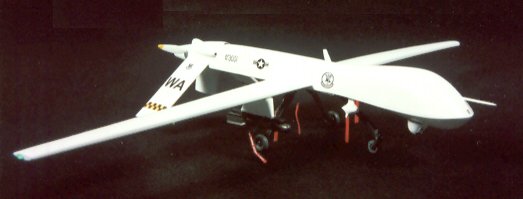
Engine inlets were drilled out. The weapons
pylons were modified with styrene strip. The Hellfire missiles are from
the spare parts box (compliments of Andre van der Hoek, a regular ARC
visitor) and were detailed by drilling out the exhaust and nose area. A
clear optical seeker head was added to each missile by using epoxy.
|
| Click
on image below to see larger image |
 |
 |
|
| A nose probe was
added from a segment of a straight pin. Colored wing lights were added
from a CMK light detail set. Remove Before Flight tags were added
based on photos. |
| I painted the Predator overall
white (Testors Model Master Enamel containing a drop of light blue to
prevent yellowing) with yellow markings on the prop. The model was
finished with a combination of kit decals and decals from the spare parts
box. The kit was then sprayed with PollyScale Satin finish followed by
gluing on the final details such as the Hellfire missiles, front landing
gear and antennas. The front sensor was also painted white, detailed
with different metallic gray paints and attached without
being oversprayed by the Satin finish. After I finished my model,
the presence of a light gray on the underside of the UAV has been
confirmed, at least for the Hellfire equipped versions. |
| Click
on image below to see larger image |
 |
|
| All in all, I
highly recommend this kit if you would like to have something different
sitting on your model shelf! |
Mike
|
|